
How to Photograph Valuables for a Home Inventory (Jewelry, Art, Electronics)
A home inventory is a list of what you own. A useful home inventory is a set of photos that would let a stranger identify each item, tell what condition it was in, and find its serial number, without you in the room. The difference is entirely in how the photos are taken, and it takes about ten seconds more per item to do it well.
This is the photography guide. It covers the three shots every valuable needs, what changes for jewelry, art, electronics and collections, what to write down alongside the photo, and where to keep it all. If you are starting from nothing, the weekend inventory plan covers the whole-house pass; this post is for the items that deserve more than a wide shot.
The three shots
For anything worth documenting individually, take three photos.
1. Context. The item where it lives: the painting on the wall, the watch on the dresser, the camera on the shelf. This shot proves the item was in the house and shows its size against things whose size is known.
2. Detail. The item filling the frame, in focus, in even light. This is the shot that shows what it is and what condition it was in. One is usually enough; for anything with a front and a back that differ, take two.
3. Identifier. The serial number plate, the hallmark inside the ring, the signature on the canvas, the maker's stamp under the vase. This is the shot people skip and adjusters ask for. Get close enough that the characters are legible when zoomed.
Then, if it exists, a fourth: the receipt, the appraisal, or the certificate, photographed flat.
Three shots, ten seconds, and the item is documented in a way that a description never manages. "Gold ring with a blue stone" describes a thousand rings; the hallmark photo describes one.
Light and background
Two habits make every photo better and cost nothing.
Daylight, no flash. Flash flattens texture, blows out anything shiny, and turns a glass-front frame into a white rectangle. Stand near a window and turn the overhead light off. If you must shoot at night, a lamp bounced off a wall beats the flash.
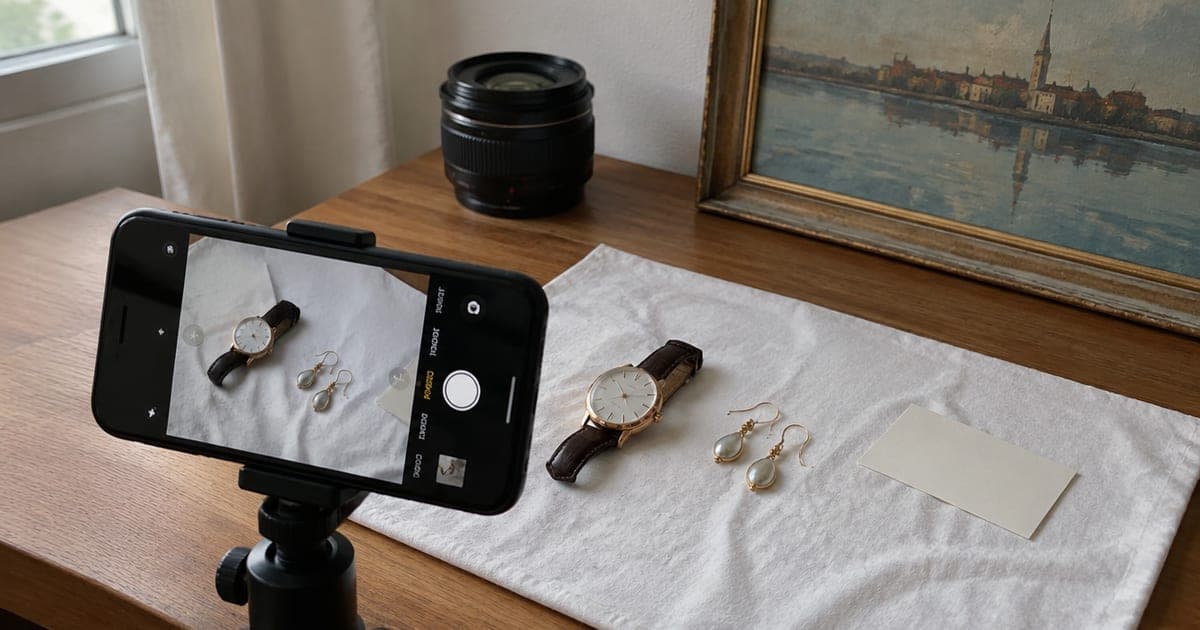
Plain background for small things. A white or gray cloth on the table, or a sheet of paper. It keeps the camera focused on the item, and it makes the scale reference obvious. Keep a coin or a small ruler in the shot for anything under the size of your hand.
Jewelry
Small, shiny and hard to describe: the hardest category, and the one where the photos matter most.
- Plain cloth, daylight, coin for scale.
- One shot of the whole piece.
- A close-up of any stone, engraving or setting. Get the phone close and let it focus; tap the screen on the stone.
- The hallmark or stamp: inside the band, on the clasp, on the back of a pendant. This is the shot that identifies the metal and often the maker.
- The appraisal, if there is one, and the receipt. Photograph both.
Pieces that live in a box together can share the context shot and then get their own detail and identifier shots. A watch adds the case back and, if it is visible, the serial engraved on it.
Art and framed pieces
- Straight on, camera level with the center of the piece, whole frame in the shot. Step back rather than tilting the phone up; tilting makes rectangles into trapezoids.
- No flash, and no reflection: for glazed pieces, shoot from a slight angle or turn off the lights that are reflecting.
- A close-up of the signature or edition number.
- The back. Gallery labels, framer's stickers, titles, dates and stamps live on the back of the canvas or frame, and they are what separate an original from a print in a description.
- Dimensions, height by width, written in the notes.
Sculpture and ceramics get the same treatment plus the underside, where the maker's mark usually is.
Electronics
The easiest category, because the identifier is printed on a plate.
- One shot of the device in place, one of it up close, and one of the plate with the model and serial number. On laptops it is on the bottom; on TVs, the back; on cameras and lenses, the bottom or the mount; on phones, in the settings menu, so screenshot it.
- The receipt or order confirmation. An email order confirmation, screenshotted, counts.
With SnapFind, scanning the product barcode on the box pulls in known product details, and custom fields hold the serial, the purchase date and the price paid on the item so they are searchable later.
Collections
Coins, records, books, cards, instruments, tools. The rule is one group shot plus individual shots for the pieces that matter.
- A wide shot of the whole collection where it lives, with the shelf or case in frame.
- Individual three-shot sets for the top pieces, the ones whose loss you would actually itemize.
- For everything else, a photo of each shelf or drawer. Multi-item detection will name the individual items from a single shelf photo, so the list exists without you photographing every record sleeve.
Furniture, rugs and the big things
These do not need identifier shots, but they need condition. One wide shot, one close-up of the material and any maker's label (under the seat cushion, the corner of the rug, inside the drawer), and a shot of any existing damage so nobody later argues about whether the scratch was there before.
What to write alongside the photo
The photo is most of the record. The notes complete it:
- Serial or model number, typed, so it is searchable.
- Purchase date and price paid, or the appraised value and date if you have an appraisal.
- Where you bought it, if a replacement would need to come from the same place.
Custom fields hold these on each item. Record them once when the item is new. Do not estimate values you do not have; a photo and a receipt are worth more than a guessed number.
Whether a particular item needs its own coverage, or a rider, is a question for your insurer, and a good one to ask them once the list exists.
Where the record lives
The record has to survive the thing that damages the house, which rules out a hard drive in the closet and a binder in the desk.
An inventory app syncs the photos to the cloud as you take them. From there, export a PDF with photos and details, and keep a copy somewhere else: a cloud drive, an email to yourself, a relative's inbox. Two copies in two places, one of them not your house.
Keeping it current
Not on a schedule. When something changes:
- New purchase: three shots the day it arrives, while the box and receipt are still on the counter.
- Sold, gifted or thrown out: remove it.
- Once a year: a walk-through with the phone, room by room, adding anything that snuck in. With the inventory already built, this is about an hour.
The first pass on the valuables is an afternoon. After that it is a habit measured in seconds, and the record it produces is the one you will be glad exists, on the day you would rather not think about.
Frequently asked questions
What photos do I need of my valuables for insurance?
Three per item: one that shows the item in context (on the wall, on the shelf), one detail shot that shows what it is and its condition, and one identifier shot of the serial number, hallmark, signature or maker's mark. Add a photo of the receipt or appraisal if you have one. What your insurer requires for a specific item is their call; these three shots cover what adjusters most often ask to see.
How should I photograph jewelry for a home inventory?
On a plain cloth in daylight, no flash, with a coin or ruler in frame for scale. Take one shot of the whole piece, one close-up of any stone or engraving, and one of the hallmark or stamp inside the band or on the clasp. Photograph the appraisal or receipt alongside it.
How do I photograph artwork for an inventory?
Straight on, no flash, in even daylight, with the whole frame in the shot. Then a close-up of the signature, a shot of the back of the canvas or frame where labels and gallery stamps usually are, and a note of the dimensions. Prints, posters and originals are photographed the same way; the back of the piece is what tells them apart.
Where should I keep my home inventory photos?
Somewhere that is not in the house. A cloud-synced inventory app, a cloud drive, or an exported PDF emailed to yourself and a relative. The whole point of the record is to survive the event that damages the house, so a hard drive in the closet does not count.
How often should I update the photos?
When something changes, not on a schedule. New purchase, one photo the day it arrives. Sold or given away, remove it. A yearly walk-through with your phone catches the rest, and it takes an hour when the inventory already exists.
Start with the five things you would itemize first. Download SnapFind, take the three shots, and the record is in the cloud before you put the ring back in the box.